
 Back to Blog
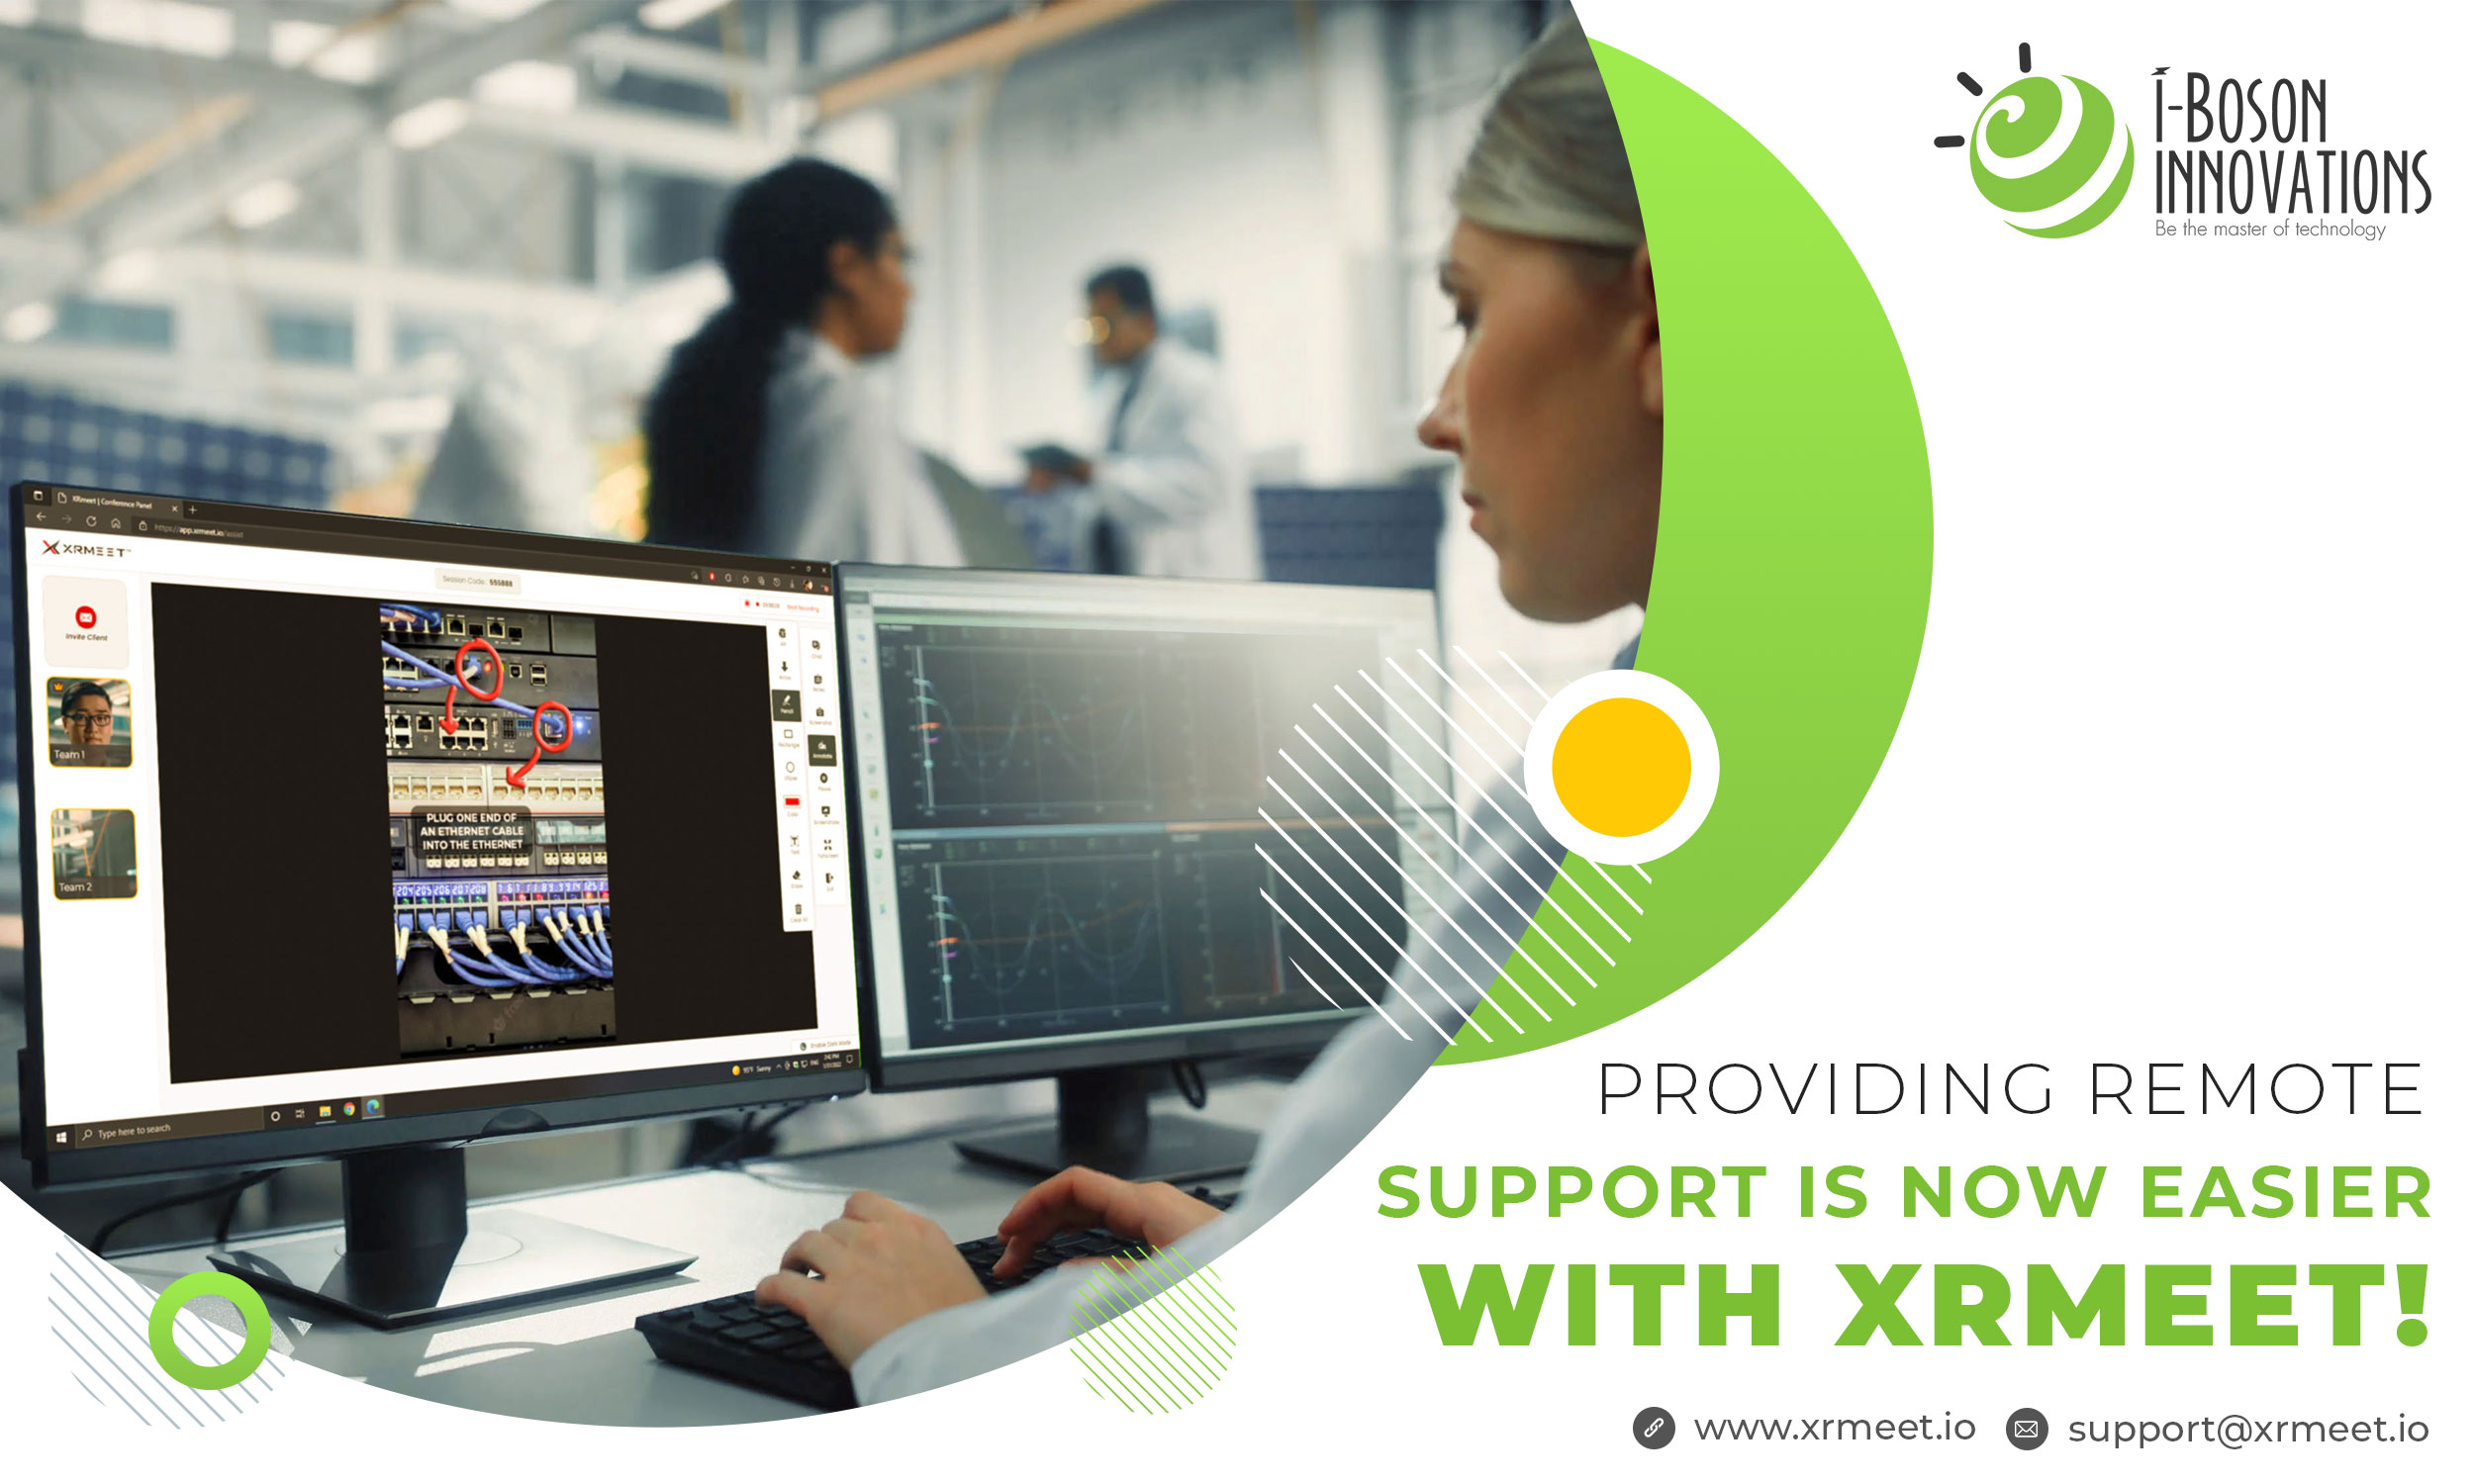
Providing Remote Support is now Easier with XRmeet!
 July 1, 2022
Hands down, I will say that immersive visual remote support is the best tool that is built using augmented reality technology. It reminds us that we can be near everyone yet be far away. Remote work is the new normal and even when the covid situation got better, many workers, as well as companies, prefer the work to be done remotely now. And with new immersive solutions around, remote work is now easier. Here, in this blog, we are going to discuss how the augmented reality platform, XRmeet makes remote support easier and a short guide on how to use it. Let’s check it out in detail.
How Augmented Reality Can Improve Remote Support?
We have already discussed various benefits augmented reality solutions extend to enterprises as well as customers. Here, we are just listing the main benefits or improvements this technology brings.
• Reduce manual errors
• Improved productivity & efficiency of the workforce
• Immersive training for the workforce
• Access to information anytime
• Real-time transfer of knowledge
• Reduce costs associated with expert travel
• Improved remote collaboration
• Access to real-time data and insights
Guide to use XRmeet Augmented Reality Platform
In a few steps below, you can make use of the augmented reality platform for your organization.
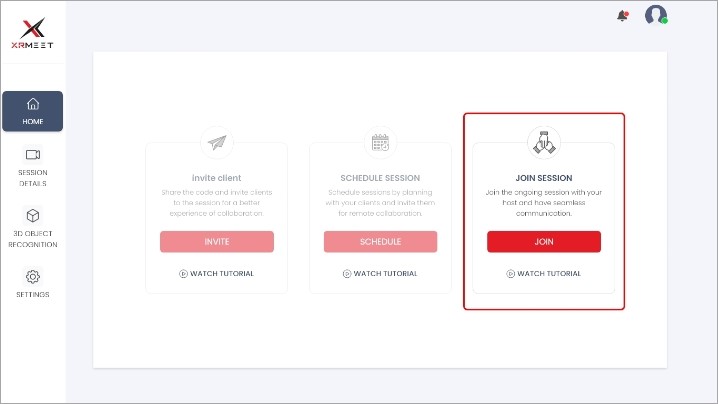
1. Login to your XRmeet account, https://app.xrmeet.io/login by entering the credentials, and you will be redirected to the home page.
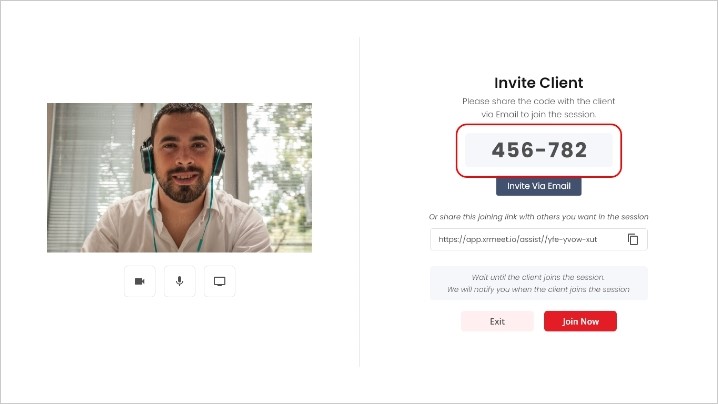
2. To start a session, click on the Invite Client option. You can schedule a session for a future date by choosing the schedule option next to invite. You can as well join a new session by clicking on join button.

3. You can send a session link and a code via email. The other party can join the session via the link by entering the unique 6-digit session code through a web browser or XRmeet app. Also, when inviting a client, the host has the provision to set his/her own camera, microphone off or on. This can be done by clicking on the respective icons on the left side.
4. In case, you were shared with a 6-digit code or a meeting link via email, then login to your XRmeet account and click on Join Session.
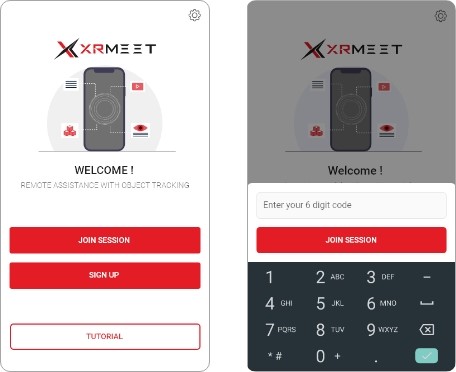
5. If you are logging in through the app, click on join session, enter the unique code, and click on the join session button.
6. Once the call begins, communicate with your clients or experts through audio, chat, AR annotations, and drawings. The experts can guide the technicians through the live video stream using a set of tools in XRmeet.
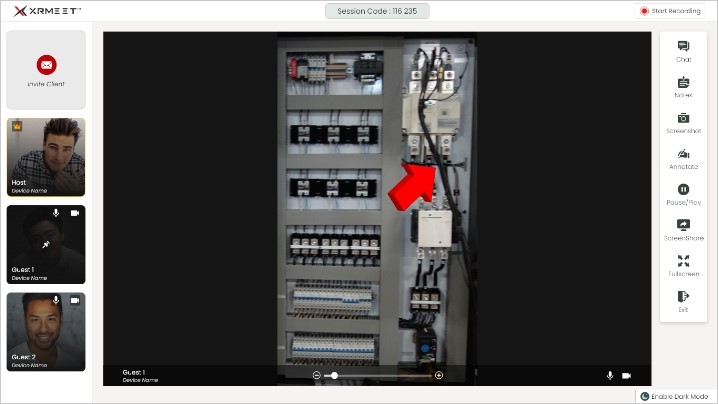
7. To use AR annotations, click on the Annotate option on the right-side bar. You can choose any AR content from the list and then tap anywhere on the live video stream to place it.

8. To convey the exact position on a live video stream, click on the arrow option on the right-side panel.
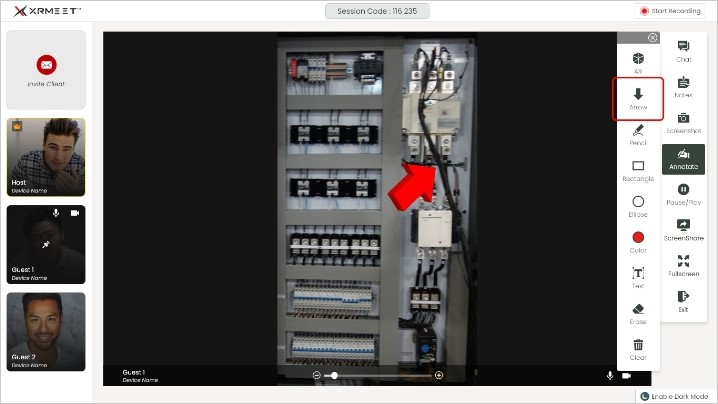
9. You can add text, pencil drawings and erase the added contents all by selecting the respective options in the side panel.
10. You can freeze the live video stream and add contents of your choice and can take screenshots whenever required.
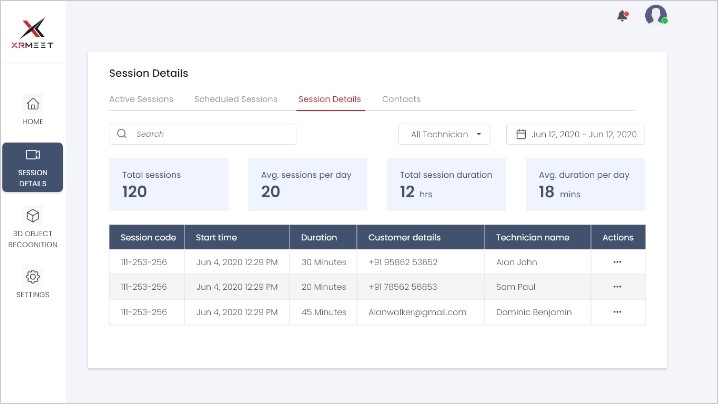
11. Once the session is concluded, you can see the insights of the session by clicking on the session details on the left side panel of the home page.
Still not made a decision?
If you are still confused whether or not to implement XRmeet into your enterprise, we encourage you to try our application for free for 14 days. Find the value we can bring to your enterprise today! For more info, mail us at info@iboson.io